Easy Oven Baked Chicken Cutlets
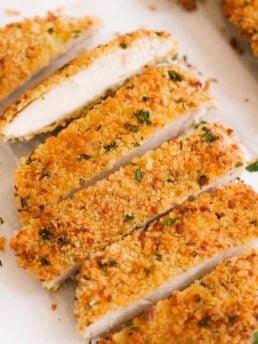
Quick, crispy, and packed with protein, these Breaded & Baked Chicken Cutlets are about to become your favorite weeknight kitchen trick. In just 40 minutes, you’ll have a tray of tender, golden-brown, healthy chicken cutlets ready to serve with your favorite sides or as yummy add-ons for salad, pasta, or sandwiches.
Need more chicken cutlets in your life? Check out another favorite of mine … Romano Crusted Chicken Cutlets.
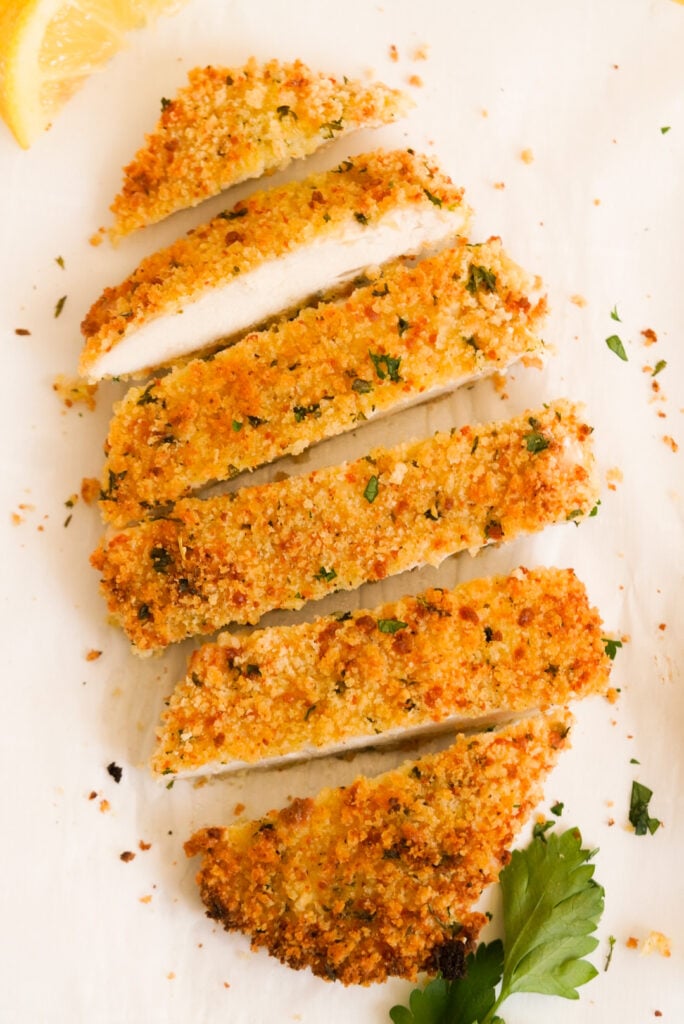
Why You’ll Love This Recipe For Chicken Cutlets In The Oven
- So stinkin’ simple. All you need are 10 ingredients (most of which are pantry staples) and 20 minutes of active kitchen time to make the best darn oven-baked chicken cutlets around.
- Crispy like they’re fried, but healthy because they’re baked. Breading chicken cutlets in a standard 3-part breading finished with light and crisp Japanese panko is the secret to getting fried cutlet flavor with way less fat and oil. It’s the best way to do it!
- Versatile as can be. Use these panko baked chicken cutlets to make chicken Milanese sandwiches, serve them on top of your favorite creamy alfredo pasta, chop them to add to your entree salads, or eat them as they are with a side of steamed veggies and creamy mashed potatoes. They’re delicious in dozens of dishes, so you’ll never get bored.
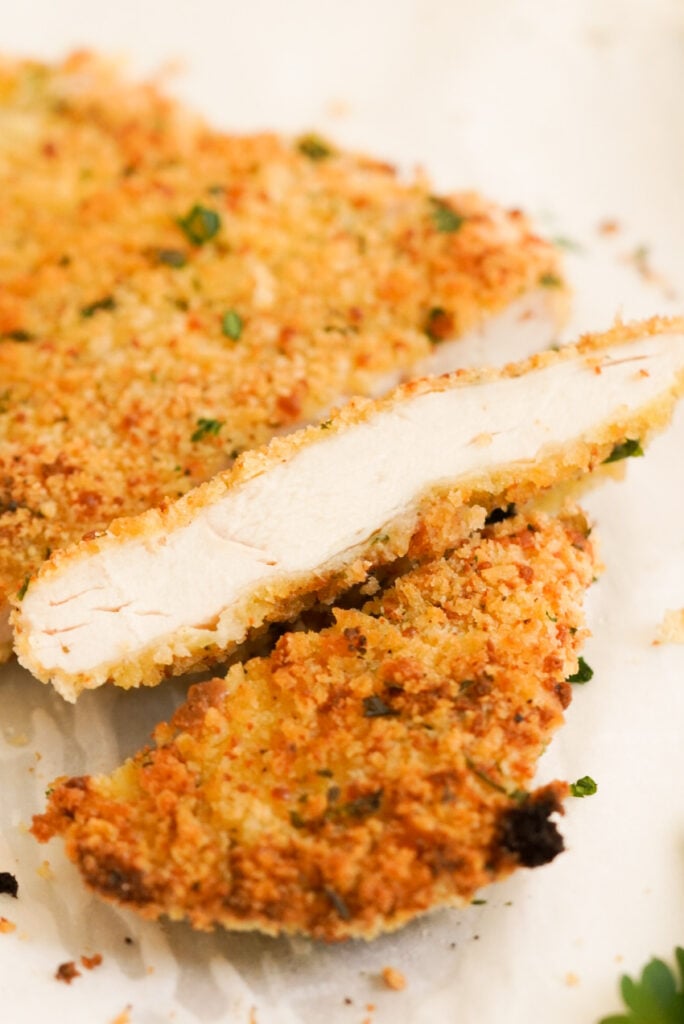
Ingredients & Substitutions
- Thin Chicken Breast Cutlets – I personally prefer thin cutlets, as they make this breaded chicken cutlets recipe cook up extra quickly. If you can’t find them (or don’t want to spend money on the extra butchering), you can absolutely make your own with regular boneless skinless whole chicken breasts. Simply slice them in half horizontally (like you would to make a hamburger bun), then pound them out nice and thin.
- Seasoned Panko Breadcrumbs – Panko breadcrumbs are light and airy with lots of extra surface area to crisp up. Opting for seasoned means you already have some good flavor in there, but you can certainly doctor up plain using about a teaspoon of Italian seasoning and an extra ¼ teaspoon of salt. In a pinch, you can swap in regular seasoned breadcrumbs but know that your baked breaded chicken cutlets won’t be nearly as crispy if you do.
- Parmesan Cheese – Make sure to grate your own cheese for the best consistency. The pre-grated kind is coated in starch, which means it doesn’t melt as well.
- Flour – This is for your dredge, which helps the egg mixture stick to the chicken. Use a light hand and shake off any excess — you just want a thin coat.
- Eggs – Eggs are the ticket to getting your breadcrumbs to stick. If you’re allergic to eggs, feel free to swap in liquid vegan eggs (e.g. JUST Eggs), egg-free mayonnaise, or plain non-Greek yogurt instead.
- Garlic Powder – For sweet cooked garlic flavor without any fuss. If you only have dried garlic flakes, you can crush them in a mortar and pestle or clean coffee/spice grinder.
- Dried Parsley – For bright, lemony herbiness straight from the pantry. Feel free to experiment with other dried herbs and spices depending on your mood! Italian seasoning, herbes de Provence, or even za’atar would be excellent swaps.
- Salt & Black Pepper – For seasoning, to taste. Kosher salt is the easiest to season with, as the wide flakes make it harder to over-salt. Use freshly cracked black pepper for the best flavor.
- Olive Oil Spray – This is my secret weapon for getting perfectly crispy baked chicken cutlets. A little spritz on the panko mixture helps achieve that covetable golden exterior we’re after. 😉
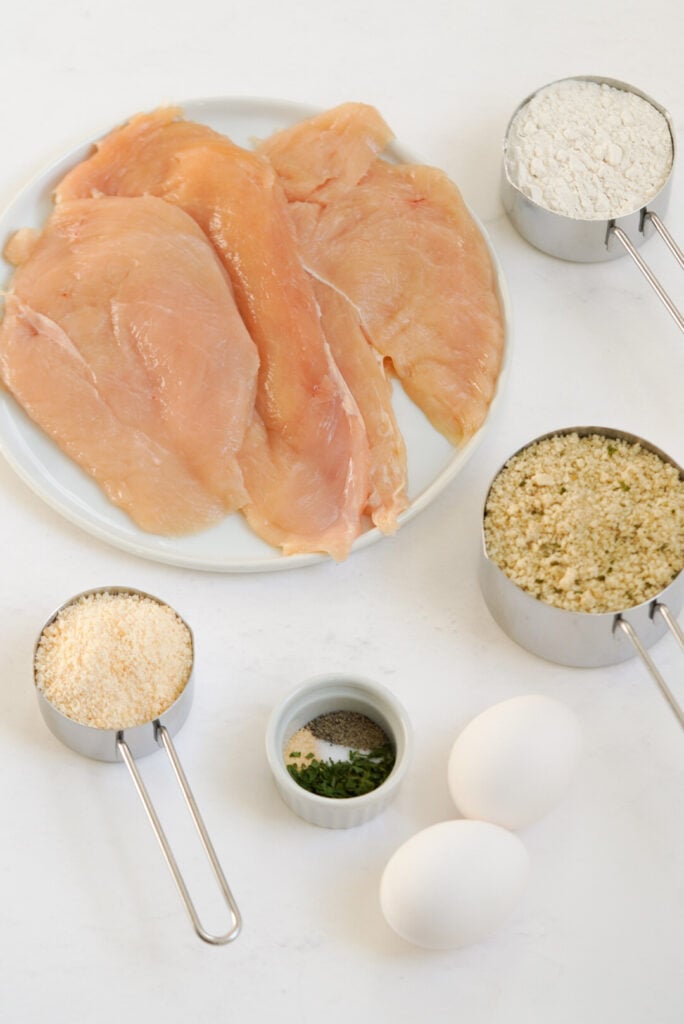
Equipment
- Measuring Cups & Spoons
- Meat Tenderizer
- 3 Shallow Bowls
- Parchment Paper
- Rimmed Baking Sheet (preferably with Rack Insert)
How To Make Chicken Cutlets In The Oven
Prep. Set the oven to 400 degrees Fahrenheit.
Step 1: Prepare the chicken breasts. Place your thin chicken breasts (or regular chicken breasts that you have cut in half) on a plastic cutting board. Pound the chicken cutlets with a meat mallet or tenderizer into an even ¼ inch thickness. Or use any heavy object in your kitchen!
Step 2: Set up your standard breading station. Add the eggs to a shallow bowl or dish and whisk. To another shallow bowl or dish add the flour. Then to the final shallow bowl or dish add the breadcrumbs, parmesan cheese, garlic powder, dried parsley, salt, and black pepper. Combine thoroughly.
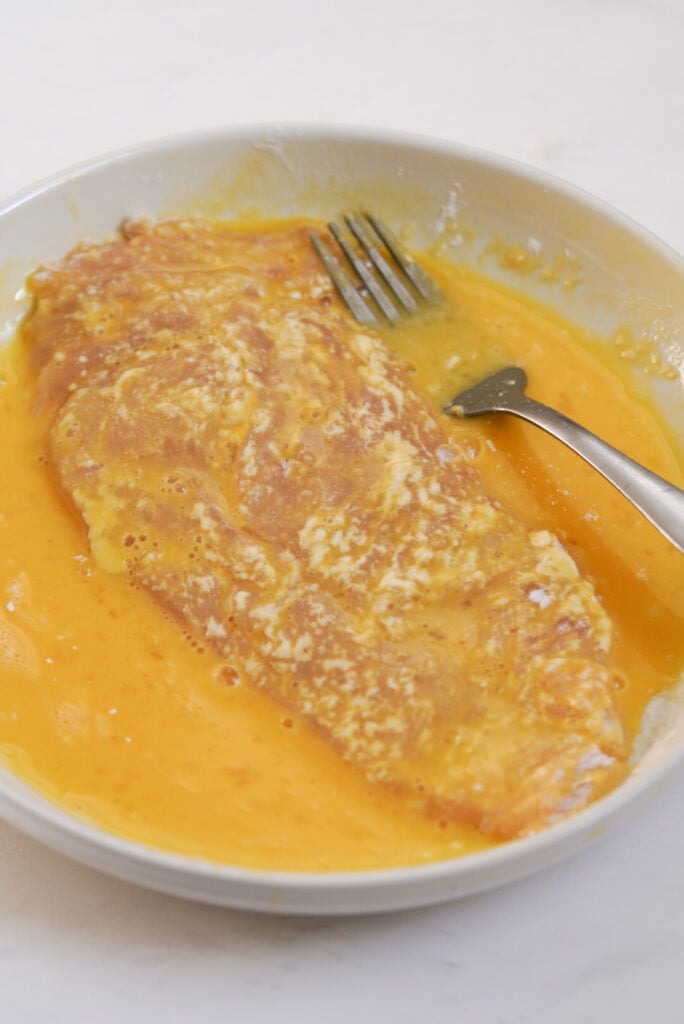
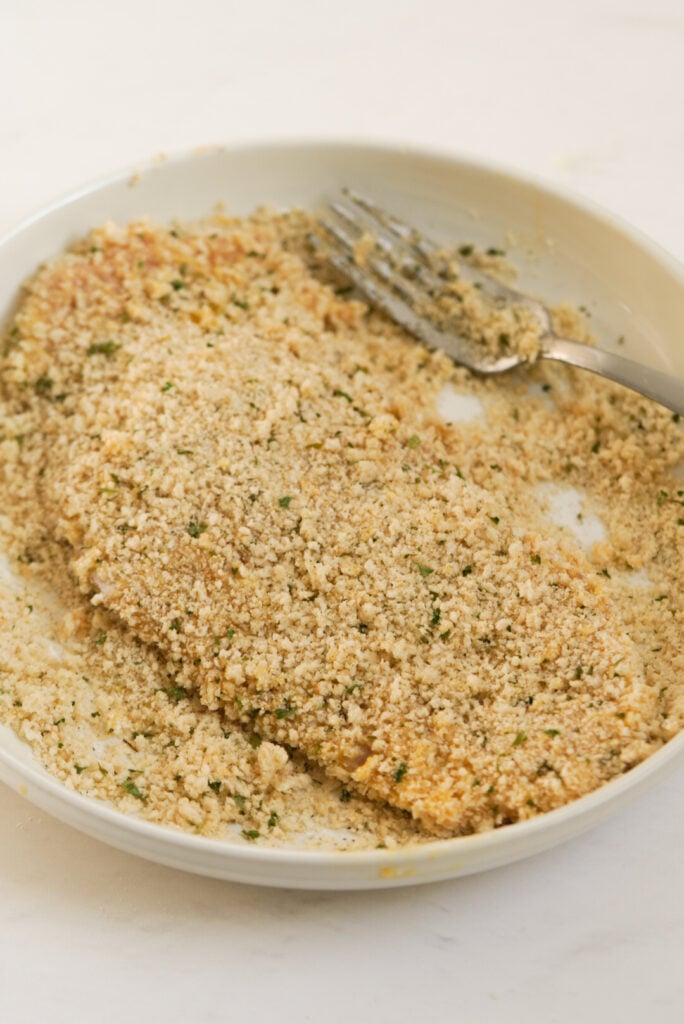
Step 3: Assemble Panko chicken cutlets. Working one at a time, dip each piece of chicken into the flour, then the egg wash, and then the breadcrumb mixture. Make sure the chicken is well-coated at each step.
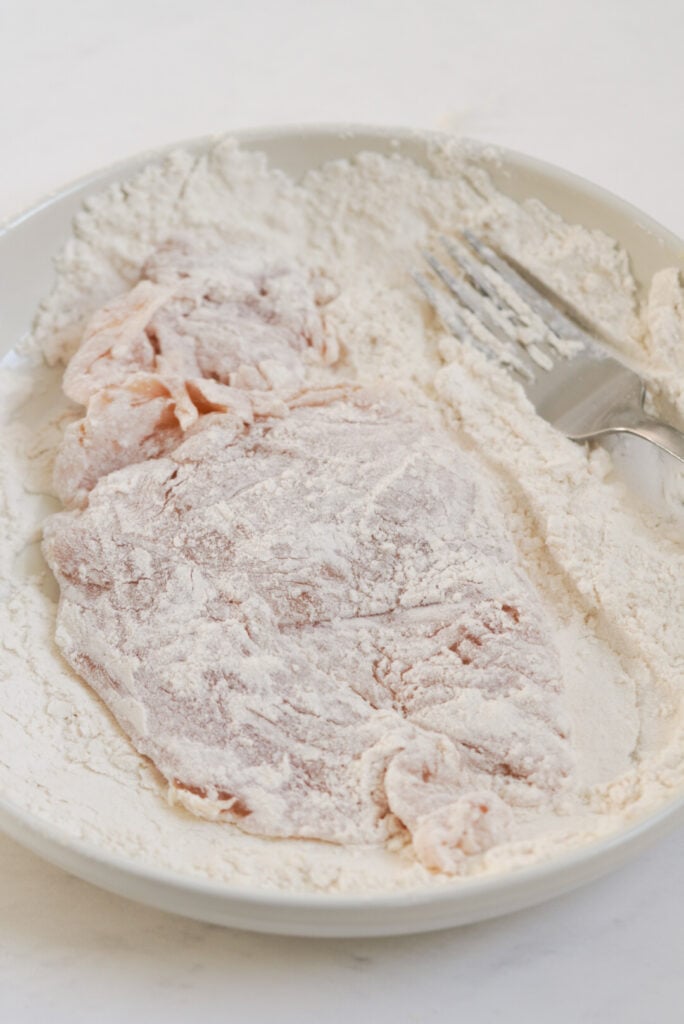
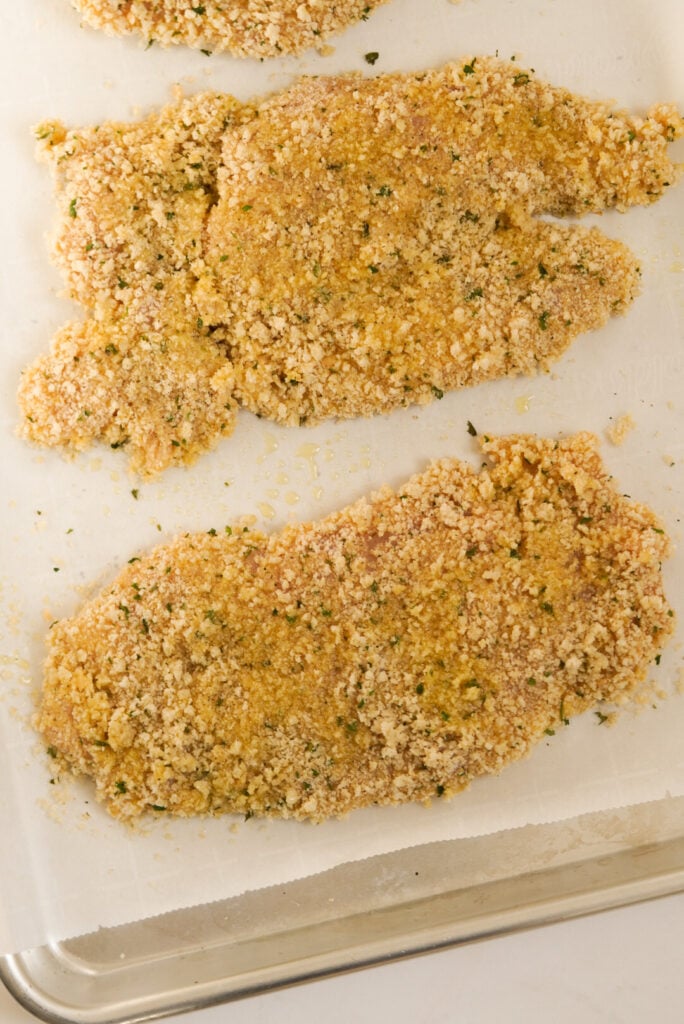
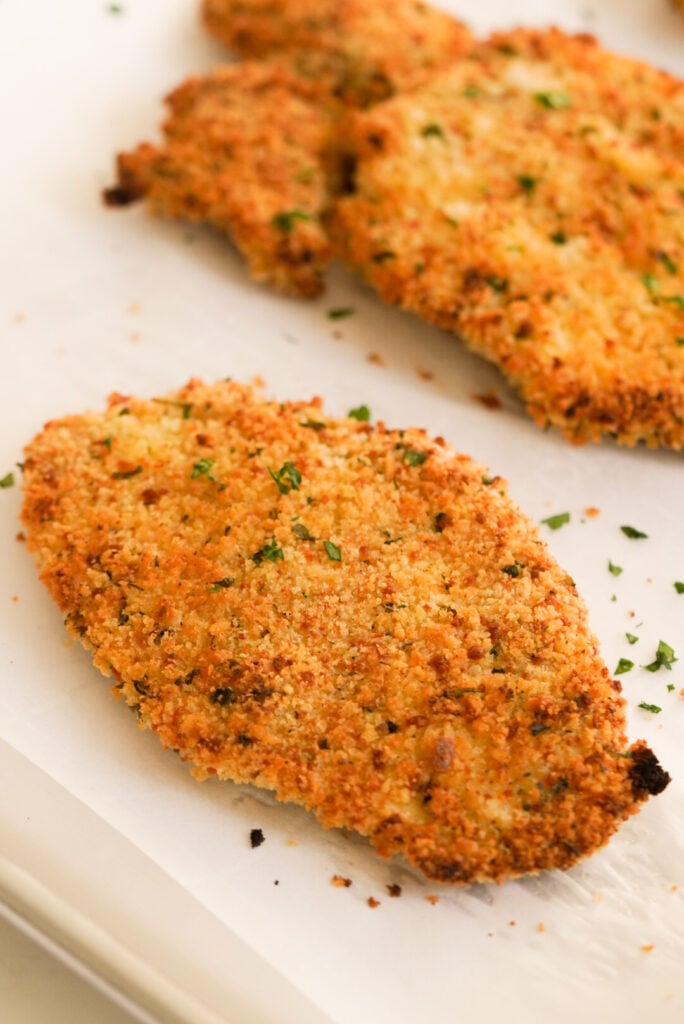
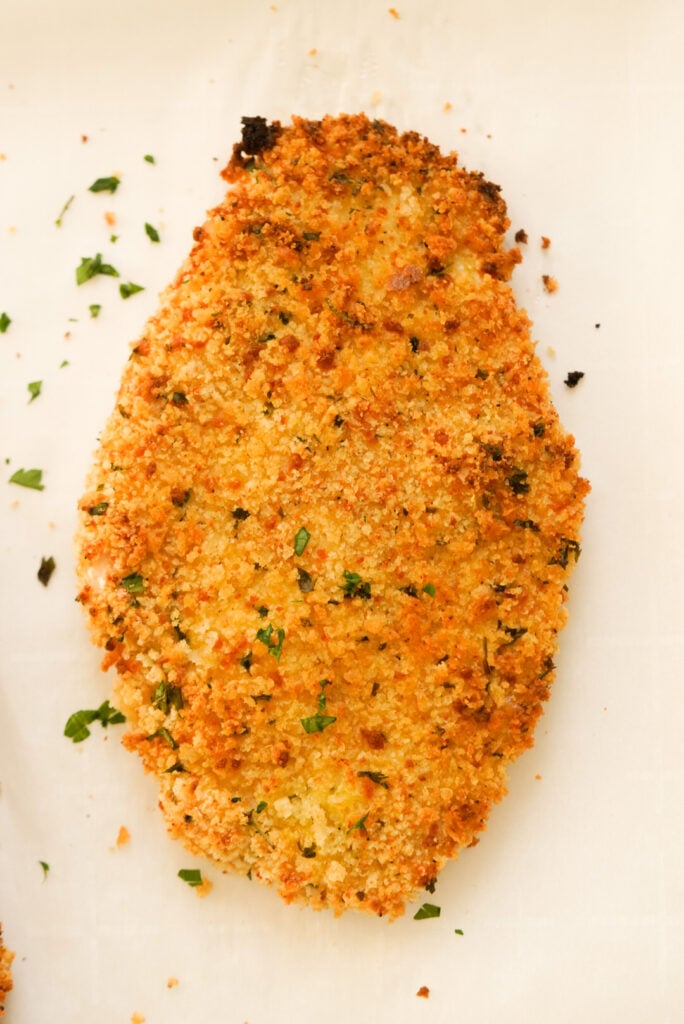
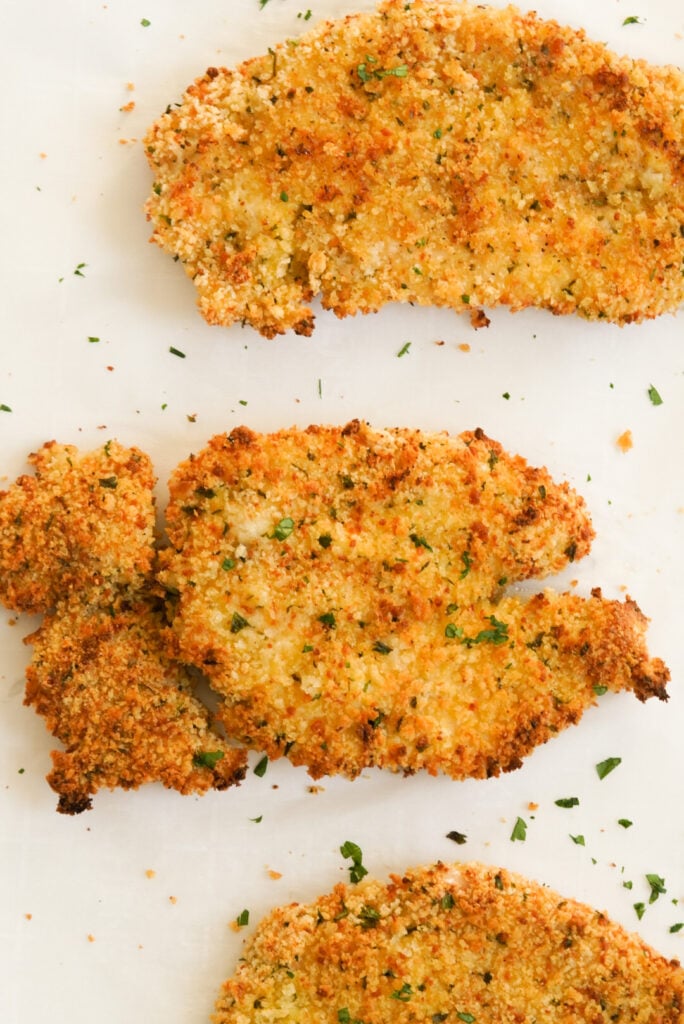
Step 4: Bake chicken cutlets. Place the chicken on a parchment paper lined baking sheet in a single layer and spray the top of the chicken with olive oil spray. Add to the preheated oven. Bake for 10 minutes, flip, and then bake for another 8 minutes. Then broil on high for 2-3 minutes until golden brown and crispy. Watch closely so it does not burn!
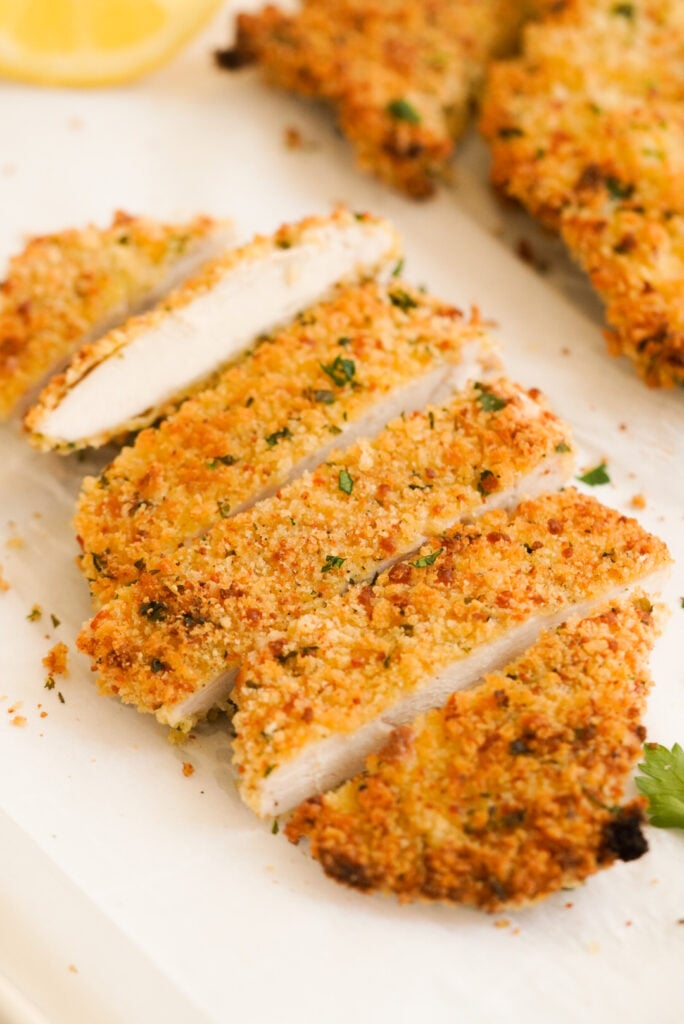
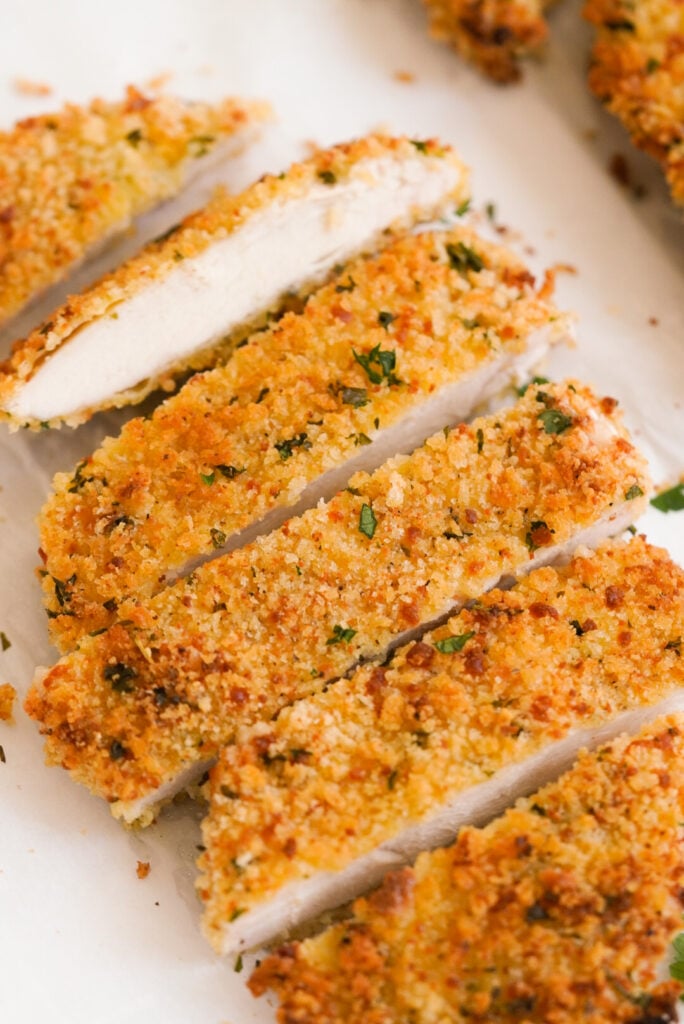
Step 5: Serve & enjoy! I like to garnish the chicken cutlets with fresh parsley and fresh lemon wedges for an extra pop of brightness, but feel free to use the baked chicken breast cutlets in any of the serving suggestions listed below.
Optional Variations & Dietary Adaptations
Just because I think these are the best chicken cutlets around doesn’t mean you have to. Here are some common adaptations folks have asked me about:
- Keto Chicken Cutlets – Want the flavor of breaded baked chicken cutlets but not the carbs? Swap in fine almond flour for your dredge, then use crushed pork rinds (a.k.a. chicharrones) as your keto panko.
- Gluten-Free Chicken Cutlets – Use your favorite gluten-free flour (rice flour gets crispiest!) and gluten-free panko.
- Oven-Baked Turkey Cutlets – This baked chicken cutlet recipe will work equally well with thinly sliced turkey breast or turkey tenderloin.
Expert Tips
- Get out any latent aggression. The best thing you can do is pound the heck out of the chicken cutlets — this both tenderizes them and ensures even thickness for even cooking. No meat mallet? No problem! You can use the base of a large Pyrex measuring cup or baking dish, or an empty wine bottle.
- (Food) safety first. Use a plastic cutting board for meat rather than wood, which can trap icky bacteria that causes food poisoning. You can get super thin ones to use on top of your wooden board if you’re short on space!
- Bread the chicken cutlets, not your hands. The trick is to use one hand for the dry ingredients (flour and bread crumbs) and one hand for wet ones (eggs or yogurt).
- For the prettiest results, don’t forget to spray the breading with olive oil before baking chicken cutlets in the oven — it really helps that exterior get the golden hue and crispy texture we’re after.
- For the absolute crispiest results, use the wire rack insert for your baking pan. Set it over the parchment paper (for easy cleanup), then place the breaded parmesan chicken cutlets on top while cooking — the extra airflow will help develop a nice crisp on both sides without having to flip the chicken.
- Broil for color. While you’ll need to keep a close eye on the breaded chicken cutlets in the oven to make sure they don’t burn, this step is crucial to getting the deep golden color we’re after.
Serving Suggestions
Now that you’ve cooked up a gorgeous batch of these baked crispy chicken cutlets, a whole world of flavorful possibilities awaits you. Here are just a few ideas to get you started:
- The Classic: Serve your cutlets with some fresh lemon zest or juice and parsley for a freshness bomb that’ll brighten everything up in a snap. Pair it with your fave carb – fluffy rice, twirly Spicy Vodka pasta, or creamy mashed potatoes with truffle oil – and some vibrant veggies like my raw carrot salad for a plate that screams “Eat me!”
- Chicken Parm & Milanese Magic: Feeling a bit fancy? Transform your cutlets into a mouth-watering Chicken Parmesan or Chicken Milanese. Just imagine that crispy chicken coated in melty cheese or topped with a refreshing arugula salad. It’s like a little trip to Italy without leaving your kitchen. Bellissimo!
- Salad Superstar: Looking to keep things light and breezy? Try chopping up your cutlets and tossing them into a salad. Whether it’s my creamy Burrata Caprese or a zesty Mediterranean Chop, these crispy bites add the perfect crunch and protein punch.
- Wrap & Roll: Who doesn’t love a good wrap or sandwich? Stuff those bad boys with slices of crispy chicken, some lettuce, and tomatoes, then drizzle with your sauce of choice. Speaking of which, a Buffalo chicken wrap with a tangy kick? Yes, please! Or make a Copycat McDonald’s Snack Wrap.
- Saucy Affairs: These crunchy cutlets are basically giant chicken fingers, so get your dip on. Whether you’re a fan of classic tomato sauce, nutty pesto, smoky barbecue, spicy buffalo, or tangy balsamic glaze, there’s a sauce out there waiting to be your cutlet’s soulmate. Don’t be shy; mix and match to find your perfect pairing! You could even steal the wonderful sauce from my Hot Honey Chicken Tenders.
- Brunch Babe: Let’s not forget about brunch! Top a fluffy waffle with a crispy chicken cutlet, a drizzle of maple syrup or white country gravy, and a sunny-side-up or soft boiled egg for a Southern-inspired masterpiece.
- Global Twist: Last but definitely not least, why not take your tastebuds on a world tour? Slice up those cutlets and toss them into a Thai-inspired salad with mango and peanuts, or layer them in a Mexican-style taco with avocado and fresh salsa. With this recipe in your pocket, the world’s your culinary oyster!
FAQs
Cooking chicken cutlets in the oven is pretty simple and quick, but the time it takes will be dependent on a few factors. First, your oven temp. I recommend investing in an inexpensive oven thermometer to make sure you’re getting the proper temperature.
Next, the thickness of the cutlets plays a roll. The thicker the chicken, the longer it’s going to take. This is why I recommend using thin cutlets and doing the extra work of pounding them out to an even thickness. If you’re working with thin cutlets, 8-10 minutes at 400F should be sufficient. For food safety, make sure your chicken reaches 165F in the thickest part before pulling it from the oven.
Let the oven chicken cutlets cool to room temperature before placing them in a clean, airtight container. I suggest using the parchment paper from your sheet pan to separate any layers — this should help prevent sogginess to some extent.
They should keep well in the fridge for up to 4-5 days, or in the freezer for up to 3 months. If you freeze them, I recommend using a vacuum sealer or a freezer-safe bag with as much air pressed out as possible to prevent freezer burn.
You can find more information here on the proper storage of cooked chicken.
Allow the chicken cutlets to defrost overnight in the fridge, then reheat. Your best bet to regain some of the original crispiness is by using a toaster oven, oven, or air-fryer set to about 250F. Bake for about 10-12 minutes, or until heated through to 165F.
You don’t technically *have* to, but I highly recommend it. Pounding does double duty by tenderizing the meat and helping achieve an even thickness. The quicker you can get your cutlets to 165F, the less likely they are to dry out.
Related Recipes
More Chicken Recipes
- Shredded Crockpot Salsa Chicken
- Creamy Herb Chicken
- Bacon Ranch Chicken Salad
- Thai Peanut Noodle Chicken Salad
- Baked Chicken Thighs & Potatoes
- Cream Cheese Stuffed Chicken
- Baked Greek Marinated Chicken
- Easy Buffalo Chicken Thighs
- Greek Chicken Meatballs
More Easy Dinner Recipes
- Mexican Beef & Rice Skillet
- Burger Salad Bowls
- Air Fryer Salmon Bites
- Italian Grinder Chopped Salad
- Baja Shrimp Tacos
- Chicken Caprese Pasta
Connect With Me!
If you make this easy chicken recipe or any of my other recipes, I would absolutely love to know! Tag me @wellnessbykay on Instagram so I can see and share your recreations.
Love this recipe? Leave a comment and a rating! I love to see and it helps me continue to develop delicious recipes for this blog.
Easy Oven Baked Chicken Cutlets
- Prep Time: 20 Minutes
- Cook Time: 20 Minutes
- Total Time: 40 minutes
- Yield: 3 Servings
- Category: Dinner
- Method: Oven Baked
Description
Quick, crispy, and packed with protein – these Breaded & Baked Chicken Cutlets are about to become your favorite weeknight kitchen trick. In just 40 minutes, you’ll have a tray of tender, golden-brown, healthy chicken cutlets ready to serve with your favorite sides or as yummy add-ons for salad, pasta, or sandwiches.
Ingredients
- 1 lb thin chicken breasts
- 1 cup seasoned Panko breadcrumbs
- 1/3 cup grated parmesan cheese
- 1/2 cup flour
- 2 eggs
- 1 tsp garlic powder
- 1/2 tsp dried parsley
- 1/2 tsp salt
- 1/4 tsp black pepper
- Olive oil spray
Instructions
- Set the oven to 400 degrees Fahrenheit.
- First prepare the chicken breasts. Place your thin chicken breasts (or regular chicken breasts that you have cut in half) on a cutting board. Pound the chicken cutlets with a meat mallet or tenderizer into an even ¼ inch thickness. Or use any heavy object in your kitchen!
- Next prepare the chicken dredging elements. Add the eggs to a shallow bowl and whisk. To another shallow bowl add the flour. Then to final shallow bowl add the breadcrumbs, parmesan cheese, garlic powder, dried parsley, salt, and black pepper. Combine thoroughly.
- Dip each chicken cutlet into the flour, then the eggs, and then the breadcrumb mixture. Make sure the chicken is thoroughly coated at each step.
- Place the chicken on a parchment paper lined baking sheet and spray the top of the chicken with olive oil spray. Bake for 10 minutes, flip, and then bake for another 8 minutes. Then broil on high for 2-3 minutes until golden brown and crispy. Watch closely so it does not burn!
- Serve and enjoy! I like to garnish the chicken cutlets with fresh parsley and fresh lemon juice.

This is a great recipe for chicken cutlets , and easy to follow . All ingredients were incorporated nicely, and created a flavorful meal. Family enjoyed this very much 💕
I am gettting ready to cook this tomorrow. How far in advance could I do chicken?
You have done a superb job of explaining how to do each step;,
I want to use the chicken over a mediteranean tomato pepper onion dish
so the chicken strips or chunks even will be fun. I will send a reply after I have cooked this recipe. If I can do chicken maybe an hr or so, have it ready while I do the
vegs roasted then I can put it together,,,,,thanks.
I just took it out of the oven and it looks wonderful. A nice recipe and easy to follow. Thank you so much.
Super easy and delish! I air fry in my convection oven on a wire grate for perfect crispiness all around. Yum!
Using the olive oil cooking spray was a great suggestion. I mixed some Italian bread crumbs in with the panko bread crumbs instead of the suggested spices. Turned out perfect. Not dry and pale looking like other recipes for chicken cutlets in oven.
Thank you for this recipe, it was great! I didn’t have garlic powder so just used minced garlic in the egg. I also added extra salt, cayenne pepper, onion powder, and paprika. Will definitely be making this often😘
This was a delicious recipe and easy! We really enjoyed it. I will be making this on repeat. Thank you!
I am excited to try this on Sunday. The one thing I will change is that I will toast the panko ahead of time spritzing it with olive oil. I also will put the chicken on a rack setting it inside of my cookie sheet, omitting having to flip the chicken. I’m hoping that it works, this recipe looks delicious and the fact that the chicken is much thinner was very appealing.
I made this today for lunch, it’s a great recipe! The store thatDe I shop at had the chicken sliced pretty thin, so my only problem was trying to adjust the length of time to cook them. I started out at 18 minutes and finally went down to 10 minutes, it gives you an idea how thin they were. I did brown the panko on parchment paper, spritzing with oil before hand, baked on a rack and they turned out great! Thank you so much for this recipe, it’s a keeper!
Unfortunately, I found it very dry and kind of tasteless. Followed the recipe exactly. Had to use dipping sauce.
I had my doubts. Oh boy, this was delicious! I skipped the flour and only had spray canola. I am sold. I topped it with some chimichurri I had. Fab!!!