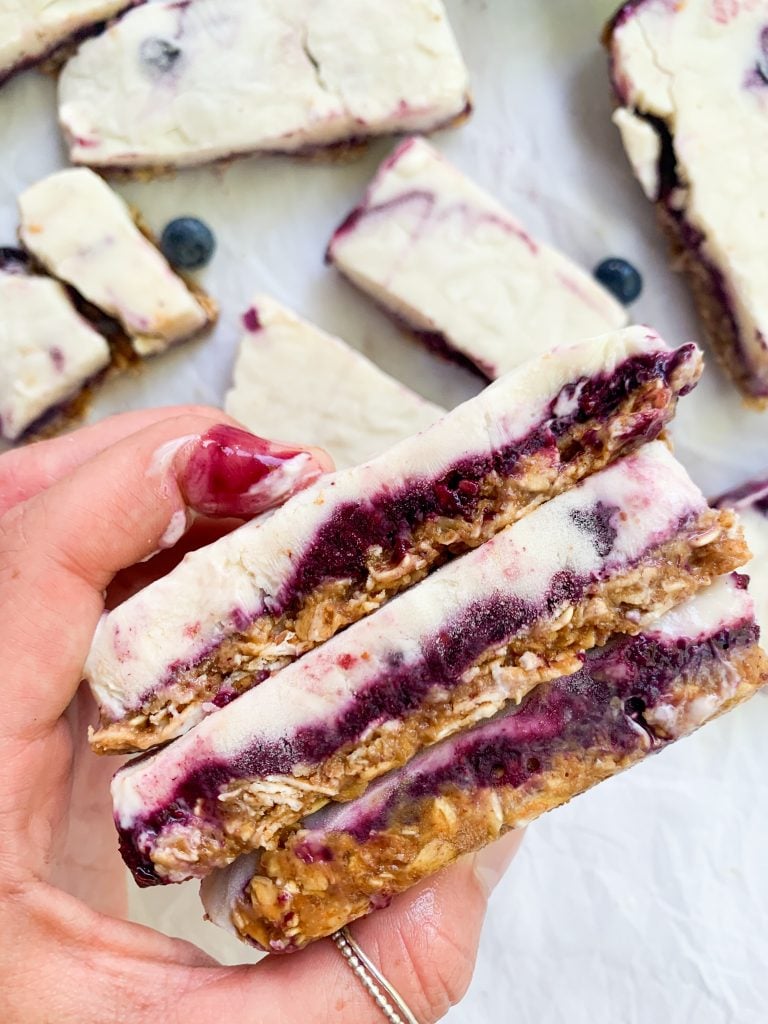
Granola & Berries Frozen Yogurt Bars
As I’m sure we all know, hot summer days are almost upon us! Which means it is time to find that perfectly refreshing frozen summer treat for the whole family. Look no further, these Granola & Berries Frozen Yogurt Bars are your answer. They are TRULY the perfect summer treat, and trust me I do not say this lightly! These frozen yogurt bars are easy to make, delicious to eat, and full of simple & healthy ingredients. They are protein packed, no-bake, and perfect to stash in your freezer to grab whenever the craving for a delicious snack or treat hits! Great for adults and kids alike too.
Love frozen sweet treat recipes? Check out my Chocolate Strawberry Yogurt Clusters and Frozen Cottage Cheese Bark too!
Ingredients needed for Granola & Berries Frozen Greek Yogurt Bars!
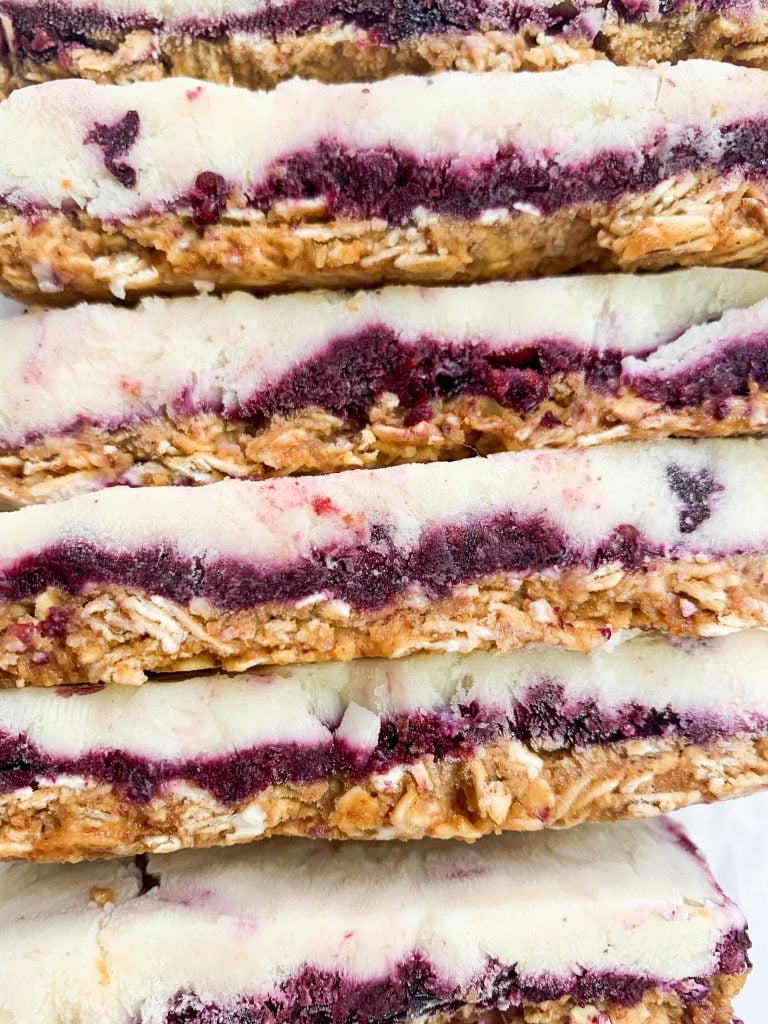
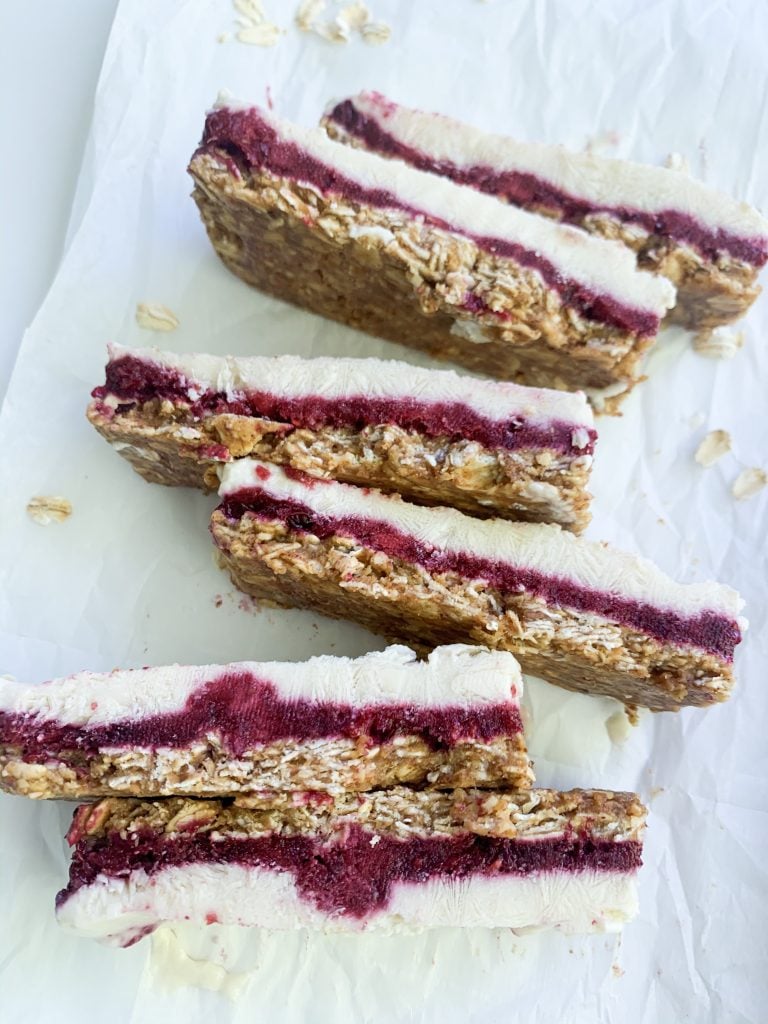
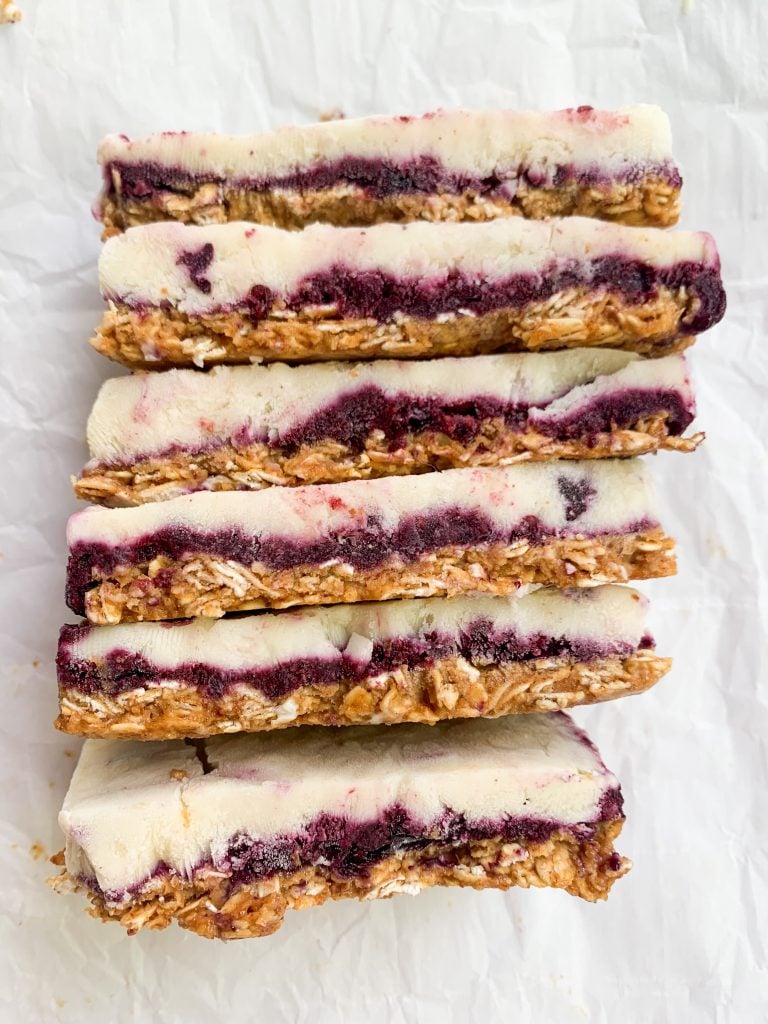
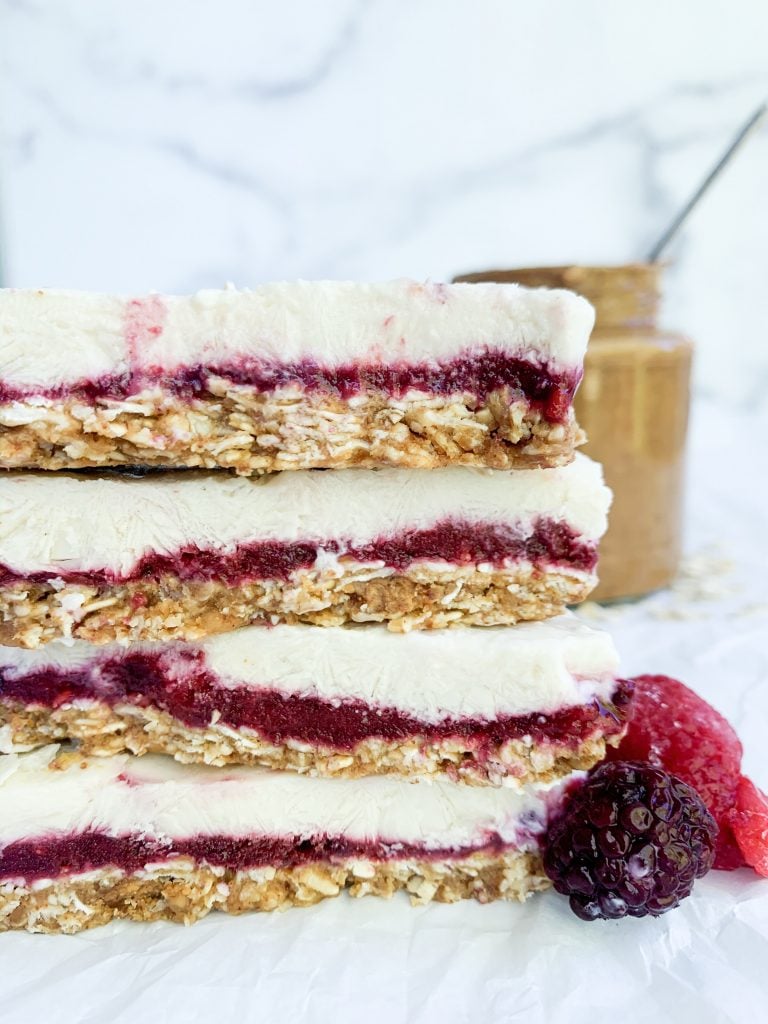
These frozen yogurt bars are made up of three layers …. a granola bottom layer, a fresh fruit middle, and a creamy greek yogurt top! All layers are absolutely delicious on their own and then when they come together it is pretty much perfection. Plus this yogurt bar recipe is made with all wholesome ingredients and is refined sugar free!
- Greek Yogurt: Can’t have frozen yogurt bars without yogurt! I use plain greek yogurt , but feel free to use a flavored version if you’d like. You will need 1 cup! You can use whichever fat percentage you’d like, but full fat yogurt will definitely make for the creamiest texture.
- Almond Butter: The base of the granola layer is almond butter! I chose almond butter as my nut butter because I love the neutral flavor it provides, but you could totally swap this with peanut butter or cashew butter. Add 1/3 cup!
- Oats: A granola layer is of course going to need oats! I used old fashioned in these, but I’m sure other types of oats would work as well. This frozen yogurt bar recipe calls for 1 cup!
- Maple Syrup: Pure maple syrup will always & forever be one of my favorite refined sugar free sweeteners to use … it adds such a rich & delicious flavor. You will need 6 tbsp separated through the different layers in this frozen treat.
- Applesauce: Applesauce provides a perfect natural sweetness and bit of extra moisture to sweet treats. 2 tbsp is the perfect amount here!
- Berries: I used a mix of raspberries, blueberries, and blackberries for these bars, but you could use any or all! Fresh or frozen works as well. Add 1 cup.
- Almond Milk: This granola base just calls for a splash of almond milk for some extra moisture. 2 tbsp to be exact!
- Vanilla Extract: 1 1/2 tsp of vanilla extract is needed throughout this no-bake recipe for that classic taste!
- Salt: Lastly, just a pinch to balance the sweet.
These frozen yogurt bars are healthy enough to eat for breakfast and delicious enough to enjoy for dessert!
How to make these Granola & Berries Frozen Yogurt Bars!
These yogurt granola bars are super easy to make! They are no-bake which means there is no need to turn on your oven. A total lifesaver in the hot summer months! Here’s how to do it:
- In a mixing bowl combine the almond butter, applesauce, maple syrup, almond milk, oats, and salt to make the granola mixture.
- Line an 8×8 baking dish with parchment paper and flatten the granola mixture into it.
- Place in the freezer while you work on the other two layers.
- In a small pot combine the berries, water, and maple syrup over low-medium heat.
- Smash the berries and let the mixture boil for a few minutes until it thickens. Remove from the heat and place in the fridge to further thicken.
- For the yogurt layer combine the greek yogurt, maple syrup, and vanilla extract evenly.
- Remove the granola layer from the freezer and pour the berry mixture on top. Spread evenly and place back in the freezer to set for about 30 minutes.
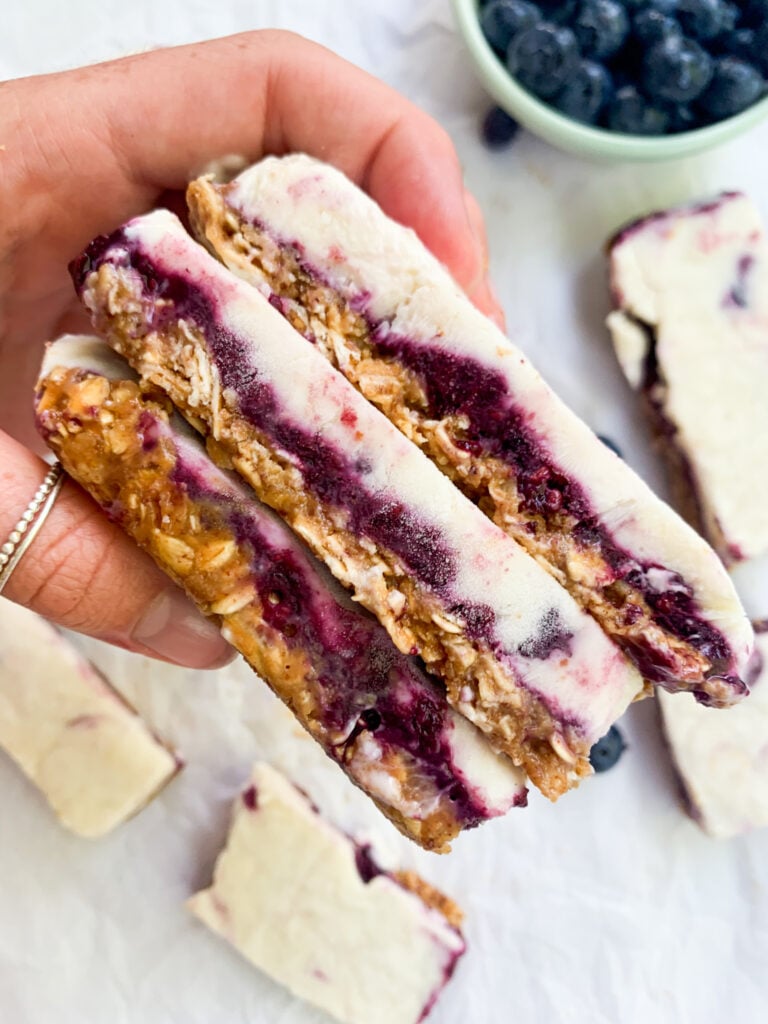
- Remove from the freezer again and pour the yogurt mixture on top. Spread evenly. (Optional: Make the swirly design with a toothpick at this point!)
- Place in the freezer again to set completely for 1-2 hours or until the yogurt is solid.
- Remove from the freezer, cut into bars or squares with a sharp knife, and enjoy!
- Store in the freezer.
Trust me, the hardest part about making this yogurt bar recipe is waiting for it while it is in the freezer!
Greek Frozen Yogurt Bars Swaps & Additions…
- Use different fruit! These yogurt granola bars are originally made with mixed berries. You can use strawberries, blackberries, blueberries, raspberries, or a combination of all. Fresh or frozen! But you could also switch out the berries for whatever your favorite fruit is … perhaps cherries or peaches. So delicious!
- Peanut butter base! I use almond butter in the granola base of these frozen greek yogurt bars, but you could totally use peanut butter too. That would give this refreshing treat a PB&J vibe, which we all know I am always down for!
- Make it vegan! You can make these bars vegan, by simply swapping out the greek yogurt for your favorite vegan yogurt. I have not personally tried this, but I’m sure it would work. If you try it with some dairy free yogurts & it does, let me know!
- Add toppings! Toppings make everything better, including this yogurt bar recipe. You could pretty much add anything you like on top. I think more berries, chocolate chips, coconut flakes, or nuts would work deliciously!
How to store Granola Yogurt Bars…
You can store these frozen yogurt bars in an airtight container in the freezer! They are the perfect healthy treat to have a freezer stash of and then grab when the craving for something cold and creamy hits.
These yogurt bars will last 2-3 months in the freezer, although I doubt you will have any left by then.
Looking for more no-bake summer treats? I’ve got you covered…
- Dark Chocolate Berry Bark
- Birthday Cake Cereal Bars
- Peanut Butter Crunch Cups
- Brownie Batter Truffles
- White Chocolate Peanut Butter Pretzel Bites
Connect with me!
If you make these Granola & Berries Frozen Yogurt Bars or any of my other recipes I would absolutely love to know! Tag me @wellnessbykay on instagram, so I can see and share your recreations!!
Love this recipe? Leave a comment and a rating! I love to see and it helps me continue to develop delicious recipes for this blog.
Print
Granola & Berries Frozen Greek Yogurt Bars
- Prep Time: 60 Minutes
- Total Time: 1 hour
- Yield: 8 Bars or 16 Squares
- Category: Dessert
- Method: No-Bake
- Cuisine: American
Description
Looking for a perfect no-bake summer dessert? Granola & Berries Frozen Yogurt Bars are your answer. Delicious, healthy, and refreshing … these easy treats are perfect for a crowd and are sure to become one of your favorite summer recipes!
Ingredients
Granola Base
- 1/3 cup almond butter
- 2 tbsp pure maple syrup
- 2 tbsp applesauce
- 1 tbsp almond milk
- 1/2 tsp vanilla extract
- 1 cup oats
- pinch of salt
Berry Filling
- 1 cup berries
- 1 tbsp water
- 1 tbsp pure maple syrup
Yogurt Layer
- 1 cup plain greek yogurt
- 1 tsp vanilla extract
- 3 tbsp pure maple syrup
Instructions
- In mixing bowl combine the almond butter, applesauce, maple syrup, almond milk, oats, vanilla extract, and salt to make the granola mixture.
- Line an 8×8 baking dish with parchment paper and flatten the granola mixture into it.
- Place in the freezer while you work on the other two layers.
- In a small pot combine the berries, water, and maple syrup over low-medium heat.
- Smash the berries and let the mixture boil for a few minutes until it thickens. Remove from the heat and place in the fridge to further thicken.
- For the yogurt layer combine the greek yogurt, maple syrup, and vanilla extract evenly.
- Remove the granola layer from the freezer and pour the berry mixture on top. Spread evenly and place back in the freezer to set for about 30 minutes.
- Remove from the freezer again and pour the yogurt layer on top. Spread evenly. (Optional: Make the swirly design with a toothpick at this point!)
- Place in the freezer again to set completely for 1-2 hours or until the yogurt is solid.
- Remove from the freezer, cut into bars or squares, and enjoy!
- Store in the freezer.
Love these! It’s hot right now here in San Diego so these are a perfect snack and tastes delicious!
yay! so so glad you enjoyed!!
I’ve made this recipe 3 times just this month!! Extremely delicious & So easy to make!! I even sent my grandma the recipe & she LOOOOVED it too!!!!!!!!! Perfect for breakfast, snack or dessert!
Oh my gosh!! I love that so much, so happy you enjoyed!
What are the calories in the bars
I came here looking for the same thing. Would be helpful if she add macros.
I am SO EXCITED to try and make this! 😍 Could you possibly use a strawberry or vanilla greek yogurt instead of plain?
Yay! And yes I think you could!
Can I use sugar free syrup?
Can’t wait to try!
I haven’t tried, but I think it should work!
So glad I found your recipe!! Such an easy on the go breakfast. I changed some things around (used peanut butter and cows milk, less maple syrup) but it’s proof that this recipe is so versatile! I am excited to experiment more next time around. Thank you for sharing
Thanks Abby! I’m so so glad you enjoyed. Those swaps / changes sound delicious too!
Can I use regular plain whole milk yogurt? I don’t have Greek on hand!
Is there a good substitute for applesauce? Would banana work or would it clash?
Could you use the same amount of honey instead of maple sugar?
Yes, that would definitely work!
Made these with peanut butter since that is what I had at the time. I want to try them with almond butter to taste test but they were very good. The creamy yogurt with the punch if the berry layer mixed with the oats is so good! I love the texture the oats give since they are not cooked. Like I said, I will be making again but with almond butter. I love being able to have them on hand as they live in the freezer. I do recommend heating up for 10 seconds or pull one out a few minutes before enjoying it otherwise it is a little too hard.
Hi Jessica! Thank you so much for the great review!! Glad you enjoyed 🙂
Wonderful – I make these all the time and they never disappoint!!
The recipe sounds and looks great, but where is the nutrition guide? I like to know how many calories I am eating, the serving size, etc.
looks so good! Can I use frozen blueberries?